Struggling to manage your appointments efficiently? Learn how to use Calendly with this straightforward guide. We’ll walk you through setting up your account, integrating your calendar, scheduling appointments, personalizing your profile, and making the most of Calendly’s features to optimize your time management. Get ready to streamline your scheduling process without any hassle.
Key takeaways
- Calendly streamlines meeting scheduling by integrating with your existing calendar to avoid double bookings and offering customization based on your role.
- You can personalize your Calendly experience by tweaking your availability, customizing event durations, and adding buffer times for better schedule management.
- Beyond basic scheduling, Calendly supports advanced features like collecting payments through Stripe and PayPal, third-party integrations, and easy troubleshooting of common scheduling conflicts.
Setting up your Calendly account

Imagine a world where scheduling meetings is as simple as sharing a link. That’s the world Calendly offers. Calendly is easy to start with. Create a free account, and you’re ready to schedule events professionally with their free plan. And the best part? You can take your own sweet time during the account setup process and come back to edit them later.
Calendly customizes the scheduling experience based on whether you’re a freelancer, a business owner, or an executive. It asks for your job role during the sign-up process, allowing you to customize settings and preferences to your specific role. As a result, you get a personalized Calendly experience that’s designed to streamline your scheduling process.
Account creation
The process of creating a Calendly account mirrors that of any other online service. You can sign up with your email or connect directly with your Google or Microsoft accounts. That’s it! The moment you sign up, Calendly automatically creates your booking page.
Irrespective of whether your email is for work or personal use, Calendly is compatible with various providers such as Office 365 and Outlook.com. This means that you can link your work calendar to your account, ensuring your availability is always updated and preventing any scheduling conflicts.
Calendar integration
Calendly’s true potential is realized when integrated with your calendar. Time conflicts and double bookings become a thing of the past. Calendly can be integrated with various calendar platforms, such as:
This allows for seamless synchronization and scheduling across different systems. Once connected, Calendly syncs with your calendar, ensuring you’re always aware of your scheduled appointments.
This integration offers the following benefits:
- Keeps you informed about your appointments
- Maintains the accuracy of your Calendly availability
- Only displays available time slots on the booking page, preventing any double bookings
- Provides seamless and efficient scheduling, all in one place
No more scheduling mishaps or conflicts with our minimum scheduling notice system in place.
Personalizing your profile
With your Calendly account established and your calendar integrated, it’s now time to personalize your profile. Personalizing your profile helps you make a strong first impression. You can add a profile pic to your Calendly account by going to the Account settings and changing your picture in the Picture tab.
Another cool way to personalize your Calendly is by changing the Calendly URL to make it more personalized. You can do this by choosing the event type name under Name and Duration and adding a custom URL under Customize your settings to direct people to a specific page on your website.
Finally, you can tweak your availability settings from the Personal settings page in your Calendly account, showing when you’re free to meet.
Scheduling appointments with Calendly

Once your account is set up, delve into the core functionality of Calendly - scheduling appointments. Calendly offers flexibility for a variety of event types, including one-on-one meetings, group events, and round-robin scheduling. Each event type caters to different needs, ensuring you can schedule meetings that fit your specific requirements.
The first step to scheduling an appointment is to create an event type. Calendly offers default durations of 15 minutes, 30 minutes, and 1 hour for one-on-one meetings. You can customize these according to your needs. For group events, you can allow multiple people to reserve the same time slot, ideal for webinars or group classes. For larger
One-on-one meetings
One-on-one meetings are fundamental to many professionals. Whether it’s a coaching session, a sales call, or a job interview, Calendly makes it easy to schedule one-on-one meetings within a specific date range. You can set specific durations for such meetings in Calendly by choosing the current Duration and picking a new duration time.
In addition to setting the duration, you can customize the time slots for one-on-one meetings. Here’s how:
- Open the Scheduling Settings section of the event you want to edit.
- Customize the time slots under the Date-Specific Hours option.
- To avoid being overwhelmed by too many meetings, set a maximum limit for events per day.
Group events
Group events enable simultaneous engagement with multiple participants. Calendly makes it easy to set up group events, allowing multiple people to reserve the same time slot. You can customize the number of people for each time slot, providing each person with their own scheduling options.
The host can set the limit for how many people can join, ensuring the group remains manageable. This flexibility makes Calendly an excellent choice for scheduling webinars, classes, or team meetings.
Round-robin scheduling
Calendly’s round-robin scheduling efficiently distributes appointments evenly among team members. This is particularly useful for larger teams where appointments need to be distributed among several members.
To set up round-robin scheduling, follow these steps:
- Select ‘Round Robin’ as the event style.
- Set the event’s availability.
- Assign specific team members to the event.
- Calendly offers two options for distributing meetings in round-robin scheduling: ‘optimize for availability’ and ‘optimize for equal distribution’.
Customizing event types

Calendly enables the customization of event types to suit your unique scheduling requirements. Whether you want to adjust the duration of events, set specific time slots, or add buffer time, Calendly has got you covered.
The customization options give you control over your schedule, ensuring you not only meet your scheduling needs but also offer a smooth scheduling experience for your invitees. Let’s dive deeper into these customization options.
Event duration
The duration of an event is crucial as it determines how long the meeting will last. Calendly sets event durations to 30 minutes by default. You can easily adjust this to suit your scheduling needs. But you can change this to suit your needs.
You can set specific durations for different types of meetings in Calendly. This flexibility ensures that each meeting has enough time to fulfill its purpose without rushing or overstretching.
Time slots and availability
Setting specific time slots and availabilities for each event type is another great feature of Calendly. This ensures that your scheduled events remain manageable and avoids overbooking.
You can set specific time slots for your Calendly events and ensure that people see the scheduling page in the same time zone as the event. This avoids confusion and ensures that invitees can book appointments at a time that suits them.
Adding buffer time
Buffer time is an essential aspect of scheduling that often gets overlooked. Adding buffer time before or after an event helps prevent back-to-back appointments and allows for much-needed breaks.
You can set different amounts of buffer time in Calendly, depending on your event types. This ensures that you have enough time to prepare for the next meeting and helps reduce the stress of rushing between appointments.
Sharing your Calendly events

Upon setting up your Calendly events, you’re ready to broadcast them to the world. Calendly provides several ways to share your events, including sharing event links, embedding Calendly on your website, and customizing event invitations.
Each of these methods provides a unique way to share your events and engage with potential attendees through event notifications. Let’s explore these methods in more detail.
Sharing event links
The most direct method of inviting others to schedule a meeting is by sharing a scheduling link. You can send the event links through email or social media, making it simple for people to access your scheduling page.
You can even customize the event links before sending them out. This allows you to make your Calendly event link look cooler and more personalized.
Embedding Calendly on your website
Incorporating Calendly on your website ensures a smooth user experience for your visitors. They can schedule appointments without ever leaving your site, increasing the chances of conversion.
Whether you’re using Wix, WordPress, or Squarespace, embedding Calendly on your website is a breeze. Once embedded, your visitors can easily access your Calendly booking page and book an appointment in a few clicks.
Customizing event invitations
Customizing event invitations gives your Calendly events a personal touch. You can add personalized messages and adjust the design to reflect your personal style or company branding.
This personalization makes your events more attractive and helps you stand out from the crowd by providing essential event details. Plus, it offers a better scheduling experience for your invitees, making them more likely to book an appointment.
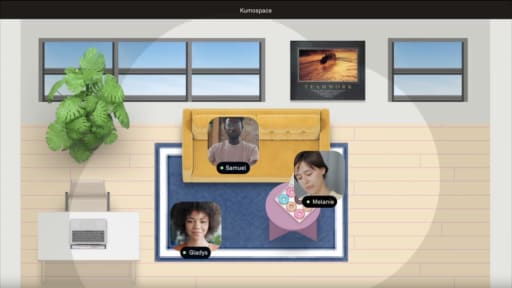
Integrating Calendly with Kumospace
Merging Calendly with Kumospace enhances your scheduling process. Kumospace focuses on seamless virtual interactions, making it the perfect partner for Calendly’s efficient scheduling process.
The integration allows you to manage your schedules efficiently, check Calendly appointments, and streamline the process of inviting participants to virtual spaces.
Connecting Calendly and Kumospace
Linking Calendly and Kumospace is a simple process. You just need to:
- Link Calendly with Kumospace through calendar integration.
- Keep track of your calendar events.
- Get meeting reminders.
- Have your status updated automatically.
This integration ensures your appointments sync up with Kumospace without any hassle. You can handle your schedules by hitting the ‘Schedule a meeting’ button, which takes you to your connected calendar for making events.
Managing appointments in Kumospace
Maintaining appointments within Kumospace is straightforward. Once integrated with Calendly, you can handle all your appointments within Kumospace, and even sync them automatically with your Google Calendar.
Kumospace offers a variety of features for managing appointments, such as setting up group meetings, scheduling team members, and setting reminders using calendar integration and desktop notifications.
Inviting participants to virtual spaces
The process of inviting participants from Calendly events to Kumospace virtual spaces is uncomplicated. All you have to do is click the ‘Invite’ button in your Kumospace virtual space and shoot out the invites to your participants.
Remember to include the Share URL of the space in the invite. This ensures that people can easily join the virtual space using a link in the Calendly invitation.
Advanced Calendly features

Having covered the basics, let’s delve into some advanced features offered by Calendly. These include collecting payments and integrating with third-party applications like Zapier, Salesforce, and Mailchimp.
These advanced features take your scheduling process to the next level with automated scheduling software, offering more functionality and customization options. Let’s dive into these features.
Collecting payments
For many professionals, particularly coaches, consultants, and trainers, the ability to collect payments for events is vital. Calendly makes this process easy by integrating with Stripe and PayPal. You can:
- Set the payment amount for each event
- Decide on cancellation and refund terms
- Handle multiple currencies, including US Dollars, Australian Dollars, Euros, British Pounds, and Canadian Dollars.
Third-party integrations
Integrations with third-party applications enhance functionality and simplify your scheduling process. Calendly can integrate with various applications like Salesforce, Mailchimp, and Zapier.
These integrations enable you to set up automated workflows, update accounts automatically, and improve your email marketing game. They save you time and increase efficiency by automating repetitive tasks.
Troubleshooting common issues

As with any software, there might be some minor issues while using Calendly. But don’t worry, most common issues are easy to troubleshoot. Let’s look at how to resolve time zone conflicts, prevent double booking, and manage cancellations.
Understanding how to troubleshoot these issues will ensure a smooth scheduling experience and keep your appointments running smoothly.
Time zone conflicts
Conflicts in time zones, particularly when scheduling meetings with participants from various zones, can be troublesome. Luckily, Calendly has a solution for this. It allows people to see the scheduling page in the same time zone as the event.
This ensures that everyone is on the same page, and there’s no confusion about the meeting time. Plus, Calendly automatically detects the invitee’s location and picks the right time zone, but users can change it if needed.
Double booking prevention
A double booking can disrupt your schedule significantly. Calendly helps you avoid this by checking all your calendars connected to your account.
By integrating your calendar and setting your availability preferences, you can ensure that you never get double booked. This keeps your schedule manageable and avoids any scheduling conflicts.
Managing cancellations
While cancellations are unavoidable, they need not create havoc in your schedule. Calendly has a robust cancellation policy that controls how guests get notified about the event and reminded of it. It also lays out the steps for how attendees can cancel their bookings, making it easy to handle cancellations.
Calendly’s cancellation policies give you control over your schedule and ensure that your meetings always run smoothly. Plus, if an event gets canceled by the client or by you, the client’s payment can be refunded.
Summary
In conclusion, Calendly and Kumospace offer a powerful combination for efficient and hassle-free scheduling. From setting up your Calendly account, scheduling appointments, customizing event types, and integrating with Kumospace, to utilizing advanced features and troubleshooting common issues, we’ve covered it all. With these tools, you’ll have a streamlined and efficient scheduling process that saves you time and improves your productivity. So, why wait? Start using Calendly and Kumospace today and see the difference it makes!
Frequently asked questions
To schedule an appointment on Calendly, go to the top right corner and click on "Create." Then, follow the prompts to set up your appointment. Easy as that!
To join a Calendly meeting, simply click the link in the confirmation email or on your calendar. Keep in mind that the links in the Meeting task are unique and can only be used once.
To get started with Calendly, create an account and integrate your preferred calendar to schedule meetings and prevent double bookings. Enjoy!
Yes, you can customize the duration and time slots for different types of events in Calendly.
Yes, Calendly can be integrated with other applications like Kumospace, Zapier, Salesforce, and Mailchimp, allowing you to enhance its functionality and streamline your workflows.